Welcome to the Streamlined Solopreneur, a show for busy solopreneurs to help you improve your systems and processes so you can build a business while spending your time the way you want.
I know you're busy, so let's get started.
Often on this show, I'm talking about how I can automate, build systems, and processes using software-based products. But one of the most invaluable pieces of hardware technology for me is the Elgato Stream Deck. It's a streamlined way for me to manage live streams, devices, and automations. I absolutely love it. In fact, since getting my first 15-key Stream Deck like five years ago, I've expanded to a 32-key and I bought two more Stream Decks in the meantime.
Every year, I end up updating my how I've configured my Stream Deck blog post over on [casabona.org]. But this year, I decided to actually release an episode about it. So today, I am going to tell you all about how I am using my three Stream Decks.
Let's dive into it.
First of all, if you don't know what a Stream Deck is, it's a hardware device with programmable buttons that you connect to your computer. It connects to services like OBS or Ecamm Live, which are both kinds of video production software. YouTube, Twitch, Philips Hue, Apple shortcuts, and so much more.
A lot of streamers and podcasters use it to manage live recordings and their environment during live streams. For example, if you ever see me change colors for my lights during a video, I am doing that with my Stream Deck.
I'm also starting timers and changing camera views, and doing all sorts of other fun stuff. Thanks to the Elgato Stream Deck. It's like having a mini control room that only needs one person to manage it. But it also makes editing YouTube videos a lot easier. Adding lower thirds and URLs, and transitions with the push of a button, sure beats doing all of it in post production.
Outside of the actual video production stuff, I am controlling my home, starting other applications, bringing other applications or websites to the forefront with the push of a button, starting Pomodoro timers, and starting regular timers. And like I said earlier, executing Apple shortcuts. When I tell people this, a common question I get is Why can't you just use keyboard shortcuts?
And I do. I love keyboard shortcuts. I even have Raycast modifying my caps lock key to make it a hyper key, which is on the Mac when you press command, option, control, and shift all at the same time. And I use that so I can have even more keyboard shortcuts. But you can't put custom graphics on keyboard shortcuts.
And the truth is the Stream Deck makes it way easier to remember certain actions. There are times when I'm unsure of what the keyboard shortcut is, but luckily, I have it mapped to a key on one of my Stream Decks. Plus, the Stream Deck makes certain integrations like with Philips Hue, easier. And the same thing goes with Ecam live.
So that's kind of my preamble for this. I'm going to show you or tell you how you or how I have set up my Stream Decks, and you can find the blog post over at [casabona.org]. It'll be in the show notes. It's [casabona.org/stream-deck]. So you can find it in the show notes.
And if you are watching on YouTube or you want to watch on YouTube, I will be sharing my screen, though, it's not really anything exciting. You're just kind of seeing the Stream Deck app up on the screen.
Okay. So let's start with how I'm using the Stream Deck XL. Like I said, this replaced my 15-key Stream Deck because I quickly ran out of keys, especially because there is support for Keyboard Maestro, which is one of my favorite keyboard shortcut apps. And it's just wonderful.
So let's dive into it.
This is Page 1 of, I'm going to be talking about page one of my Stream Deck first and the way I'm going to do this, I lay it out in the blog post too. I'll be going row by row.
So, the Stream Deck XL has four rows with eight buttons. That's how you get 32 keys. And my Stream Deck XL actually has two pages. So it does have paging abilities.
So starting in Row 1, I have the ability to turn on the Focus app, which I think is over at HeyFocus.com, maybe or HeyFocus.app, HeyFocus.com.
The focus app will block distracting websites and apps. And so this runs a shortcut as well. I start the Focus app. It runs a Timery, timer. It sets my focus modes on all of my devices to green zones, which kills all notifications except texting calls from my wife and my kids' schools.
And when I want to do deep work, I push that button because again, Focus is a great app that will straight up close my email app. For example, I compulsively check my email app. And so one of the things I make sure to do is when the focus timer is running, when I'm in a deep work mode, I can't check my email. I can't check Slack. I can't go to any of the distracting websites.
I also have a bunch of timer buttons here. So I have the ability to start a timer in Timery, stop Timery, and then add time to whatever project which brings up a little menu box. So, I push the button, and then it will go ahead and ask, like, what was the project, and how much time did you spend? And things like that.
Then the rest of this row is specific timers inside Timery. So I have a writing timer, a general management timer. Then I have the Apple Music button. I very rarely use this. Like to be honest, I could replace it with something. I just haven't thought of something better, but it is a way for me to open Apple music very quickly.
And then four more timers, my timer for when I do rss.com work, my timer for when I do wizard's guild coaching, my timer for when I do just regular coaching, and a personal timer, which I will generally attribute to if I have a therapy appointment, or if I am doing something for the kids or if I go to the gym, I'll push the button, go to the gym. When I come back, I'll stop that timer.
The third row is the first four buttons are Apple Music controls. So, previous track, play, pause, next track, and shuffle. And then four more timers, my CRM timer, which is sales-based calls or sales-based work. So if I'm doing cold outreach or just outreach in general, following up stuff like that, the podcast timer, which is running right now because I am recording a podcast, the product work timer, which I usually do when I'm doing like website copy and stuff like that.
And then I website timer because while I don't do a lot of web development for higher work, I do have a couple of projects right now. I generally try to work with nonprofits on that stuff. And so I do run a timer for that.
The bottom row is a variable row. So there are a number of shortcuts. The first one will take a list of Markdown links and turn it into a YouTube-friendly set of links. So this is like if I'm copying something out of Notion for a YouTube video, I'll run this shortcut. It'll replace the text on my clipboard with YouTube-friendly links because otherwise it's just plain text.
Then I have the turn off all of my key lights, but in the turn on, the office shortcut turns my lights red, turns my lights white, turns my light streamlined solopreneur yellow, and then a shortcut that will replace my custom Tela URL with the Tela.tv URL because some services don't recognize Tela's custom URLs when you're embedding one is circular, and I'm embedding Tela videos and circles all the time.
So I, especially on Tuesdays, Thursdays, I am pushing that button dozens of times per day. And it, again, it'll take the URL, look for the domain video, videos.casabona.org, and replace it with Tela.tv so I can embed that video.
The last button on page one takes you to page two. And this is really like a mishmash of stuff. So I'm not going to go row by row here because all the rows aren't filled up, but I do have a number of buttons here largely for different scenes in Ecamm live.
So I have my D cam, which I think is a different set in my office. I have an OB and OBS. I'm sorry, Nope. Obsbot Tail 2, which can do pan, tilt, and zoom. And so I've configured the camera to point to a different part of my office where I can do talking head videos, just with a different set.
And then I do have this, the E camera. So I have, I'll get to the A, B, and C cameras in a minute, cause they're on a different Stream Deck, but that was the, that's the D camera that shows a different set.
The E camera crops my primary camera just slightly differently in Ecamm Live, because if I'm standing or sitting, I want the frames to be a little different. I have a sit-stand desk. So I have different zooms for the different views there. I have a split screen. I have a button that just brings up the Taylor Swift GIF of it's me. Because I end up saying that a lot.
And the rest of the buttons are really different scenes for live streams, bringing up comments, and scenes I'm more likely to swap out based on the video I'm creating, which is why there's a lot of open space on page two of the Stream Deck. So I can just kind of drop scenes in there and like not have to delete stuff.
I do have one that's really nifty. It is called an ad marker. It's in Ecamm Live, and it will allow me to basically add chapter markers. So I could be talking, I can press the add marker, and then I can put in text like page two of 32 key, right? And then it'll timestamp the video with the text in a text file when I'm done recording. So, if I want to add chapter markers to a video or podcast episode, the ad marker button is really clutch. I always record an Ecamm live. And so that's been super helpful for me.
So, 32-key Stream Deck, page one, very organized. I've arranged the buttons and groups based on how easy they are to reach the page, to the wild West, just various things in various places, but that's okay. Cause I'm usually not looking at page two.
So, that's my Stream Deck XL. Let's move over to the Stream Deck Plus now. This is also something where I have two pages. And if you look at either the video on YouTube or the screenshot in the accompanying blog posts for this episode, you'll see a couple of things. This might drive people crazy. I've arranged the letters, but again, these buttons are based on how easy they are for me to reach with my left hand.
Just so you get an idea, I'm looking at my desk, and my Stream Deck XL is the farthest away on the right. So I'm reaching for it with my right hand, my Stream Deck Neo, which we'll talk about in a minute, is right next to it. And the Stream Deck XL is on my left. And that is, I can get the closest to me.
And it's also right under my like low-profile boom arm. I've kind of arranged things based on how easy these buttons are for me to get, but it does like get, it does drive me a little crazy. I haven't said why yet.
So the Stream Deck has two rows and then a row of knobs. And the first row is a 6,400 scene. So, this is the main camera scene. And then if we're looking at the first quadrant of the button, so like Row 1 column one and two, and Row 2 column one and two, it goes camera like scene three, A, B and C. And it just looks very strange because A, B and C are not in order.
But, A is again, my primary camera. B is my OBS or my, I'm sorry, my OBS bot tail to side view. This is like a working camera if I'm sitting, and C is the same camera. But if I'm standing, I usually use C zoomed in when I'm recording my short-form videos. So, that is why I have these cameras arranged the way I do.
So again, Row 1, camera only scene, and then camera A, and then the screen sharing scene, and the go live button. I put the hardest to reach, so I don't accidentally push that one. And if I'm just recording, it'll just record. And if I have it set to live, it will start a live stream.
Row 2 is cameras B and C. The ones I was just referencing for the OBSbot to Tail 2. Camera A overlay. So this is an overlay I can put in any scene, and I can take that away or add it. So if I'm, if I've created a custom scene for something, and I want to add my head to it for a minute, that's the button I'll use.
And then the last button is to go to page two. But first I want to talk about the knobs. I love the knobs on the Stream Deck Plus. When they first rolled out, they weren't super useful, but they're a lot better now. So if you, they also push in so they can serve as buttons as well.
And so I actually have a stack of buttons for the first two knobs. They will switch.
The first knob is my adjust temperature knob. And so I will turn the knob to adjust the temperature of the current light. And I will push the knob to cycle through my light. So, I have my key light, left key light, right key light, air, and key light Neo. And I can control the temperature, make it, which is like a more orange or yellow tint, by cycling through these buttons.
The second knob does the same thing, but for brightness. So again, I have all four key lights here, and I can adjust the brightness of the current one, push the knob to move on to the next one.
The third knob controls my Obsbot Tail 2 in three ways. So, like Ecamm Live because it allows you to add pan, tilt, and zoom. However, I've noticed that for the OBSBOT tail two, it's really new Ecamm Live or OBSBOT tail two, like one that they don't support each other for Zoom yet. So, I can change the pan and tilt. I can't change the zoom yet.
And so one of the knobs on the Stream Deck Plus OBSBOT supports the Stream Deck is to change the zoom.
Another knob is to change the color temperature on that because it's in a different spot. I usually need to adjust the temperature if I want some consistency between the shots and the saturation as well. So I can control those three things from the knobs.
The last knob is I don't think that's a stack. I don't change it very often. If it is a stack, it's got two. One is, Oh, they're both Ecamm volume levels.
So, one is my mic level. So if I feel like I'm spiking, I can quickly adjust it from my Stream Deck. And then the other is the system volume. So I can mute that. If I want to like share sound from my computer, that's what this knob, that's what that knob setting is for.
Page two has two purposes. All of the buttons are scenes I have specifically for when I do rss.com videos. So I can add, for my lower third, share the screen and add different overlays that have the rss.com branding. I can also change my lights orange to match the rss.com branding colors.
And then the knobs all control the Elgato prompter. So I can turn it from a second screen to actual text. I can change the brightness, the scroll speed, and then I can start and stop the prompter.
So that's what the Stream Deck Plus is for. I'm usually looking at it on page one. Again, unless I am either using the prompter or recording for rss.com.
The last Stream Deck is also the newest in this bunch. It's the Stream Deck Neo. I got it because before I rearranged my office, the other two Stream Decks were in weird spots, and the Stream Deck Neo is really small and can be very purpose-driven.
I also like that it has built-in page buttons. So there are two buttons on it that will page for you. And it also has the date and time on a screen in the middle. And that's really nice too. It's a really easy way for me to glance at the time.
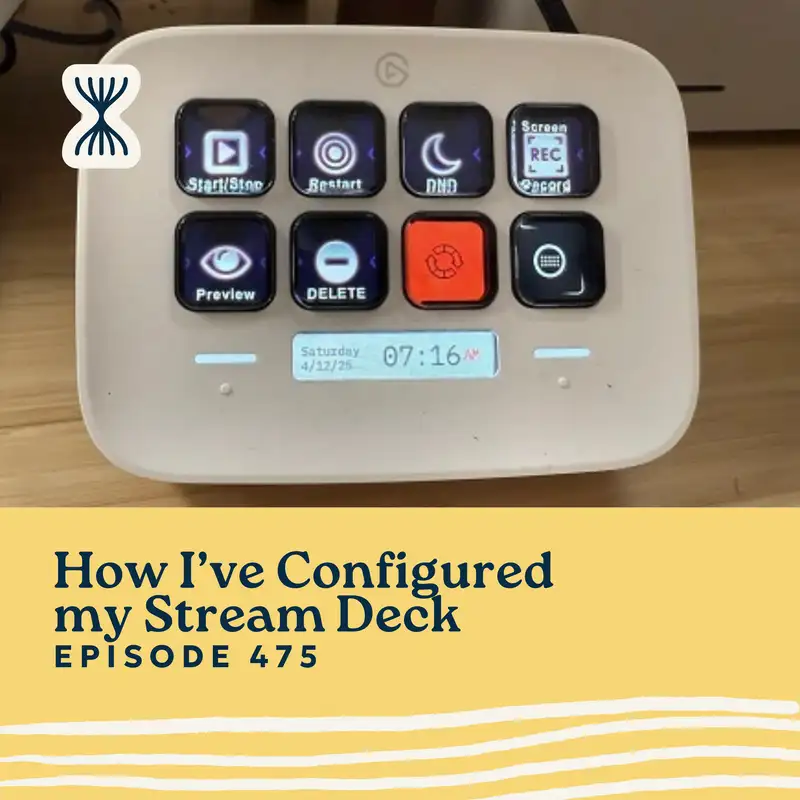
So, here's how I'm using the Stream Deck Neo. It's got two pages as well.
The first page is usually for Tela or screen recording. So if we're doing Row 1 has four buttons, I should say the Stream Deck Neo has eight buttons. So, Row 1 is start and stop Tela recordings, but in two in Row 1 is restart the tele recording. So if I mess up, I can just push the button and restart.
But in three is turn on do not disturb mode on my computer so that if I am recording or trying to focus, but I don't want to go into the green zone or start my focus timer, I can just turn off notifications. Usually, I'll do this if there's like a group chat that's popping off, that is just like annoying me.
Then the last button in Row 1 is screen record, and this will use the clean shot access screen recording function. I only use this if I don't need to talk, and usually it's I'm like sending a demo, creating a gift on how to do something, or working with support for some reason.
Row 2, starting at button one is preview for Tela. So when I am done recording a video for Tela, I push that button and it takes me to the video I just recorded on the Tela editor so I can quickly edit and export if needed.
And then the second button in Row 2 is delete. So, if I mess something up, I delete it.
The third button is currently red. It's just like a red cycle button. And this actually tells me the status of my recording light in the kitchen.
So, I've seen, I've run into an issue where I have some automation run at some point that turns my recording light red even when I'm not recording, and that's really annoying. And so having the visual representation here tells me, Oh. The recording light is red even though it shouldn't be. So, I pushed the button and it turned white. And so it's a nice way for me to quickly glance at the status.
And then the last button in Row 2 on the Stream Deck Neo is to bring up the Stream Deck app because the Stream Deck app runs headlessly. And if you navigate away from it, it can be hard to find again, which is very annoying. And so I just have a button to quickly bring it up.
The second page of the Stream Deck Neo is all stuff I do in Zoom. So, the first button in Row 1 will move the Zoom window from either my prompter to my studio display or vice versa. I will use this if someone is sharing their screen, because I like to have it on my prompter so I can make eye contact. But if someone's sharing their screen, I want to see the bigger version on my screen.
The second button is to toggle video.
The third button is to share my screen.
And the fourth button is to record the call.
Going to Row 2, the first button in Row 2 is to show the chat, so I don't have to go find it. The second button is to mute my mic. And then I've got two buttons that I'm experimenting with because nothing has worked consistently so far. One is to leave the call. And so if I am not the host, I can push this button to leave.
The last button is supposed to completely end zoom and it's a multi, it should be a multi-step action of opening Zoom, and calling a delay for a second, and then pressing enter which should effectively press the end meeting button and then confirm on the dialogue and it just hasn't worked consistently, which is very frustrating, but I'll figure that out. It's important enough for me to have as a button on my Stream Deck.
So that's the whole tour. That's all of it.
I hope that it wasn't too visually reliant, though there is a YouTube video if you do want to see what I'm talking about. I suspect that if you prefer like reading through this, you can find that over at [casabona.org]. But let me know what questions you have about the Stream Deck and how I'm using it. Or if you have questions about how often I change things or how I manage a bunch of stuff, let me know.
But that's it for this episode. I hope you liked it. You can write in at [streamlinedfeedback.com]. That's streamlined with a “d” feedback.com. You can find all the links I talked about in this episode in the show notes or the description, wherever you're listening or watching
And until next time. I hope you find some space in your week.